Uncategorized

Inspiring Summer Entertaining for Thermomixers with Milli Taylor

I organised a very successful cooking class for users of Thermomix, with London’s “it” girl for canapés and party bites: Milli Taylor.

Coinciding with her recent book launch she shared wonderful recipes for easy summer entertaining.  We finished off the class with a mezze lunch with all the yummy things we cooked.

Thank you Milli! 61gO61qFd1L._SX258_BO1,204,203,200_

Advertisement
Standard
Uncategorized

Gazpacho: Sunshine in your Mouth

IMG_5913A beautiful day in London, and a friend has asked me for my gazpacho recipe.   This is a really Spanish recipe, no cumin, no nonsense.  For best results, get the tastiest tomatoes you can find, the best EVOO, and a fine Sherry vinegar (in London I like Carbonell), get your Thermomix and a few minutes later you have summer in a glass… In Spain we have it in a glass or even in a soup bowl.  In which case, if you are having it with a spoon, you also get a little plate with the same veggies used in the gazpacho, finely chopped.  Sometimes you will get chopped hard boiled egg and even serrano or Iberico ham.  You add crunchy texture to your gazpacho if you like from any of the above.  Normally, I cannot wait to just have a glass so I part with the little crunchy bits… Maybe a nice slice of 5 seed bread or another bread of substance and you have a delicious meal.  This recipe will yield 6 portions.

Ingredients:

1000g ripe tomatoes

1-2 garlic cloves

50g green pepper

40g onion

70 g cucumber partially peeled

30g sherry vinegar

1 tsp salt

8 ice cubes (optional)

50-100 EVOO

200g cold water

1. Put all veggies in the TM bowl, plus the vinegar, salt and ice (if using).  30 seconds speed 5.  Then, (this is the noisy part, sorry), 3 minutes, speed 10.  The traditional method would have you passing the soup through a Chinoise…  This is a one bowl deal!

2. Add EVOO, 2 seconds speed 7.

3. If you want it more liquid you can add ice water, if you prefer it thicker, add about 150g of white bread (no crust) in step 1.  (I never do…)

4.  Drizzle a bit of EVOO on top for presntation if you like, or a few drops, and have your little chopped vegetables nicely diced up.

Tip: If you want to add the EVOO along with all the veggies at the start, you can, but you will get a more orangey emulsified color.

IMG_5915


Standard
Uncategorized

Yummy Cauliflower Cake – Yes, really!

Cauliflower pieCauliflower3This is an Ottolenghi recipe that I have adapted for the Thermomix. For most British people cauliflower brings memories of soggy cauliflower with some indescribable, runny, apparently cheesy sauce. And a fetid boiled smell… Luckily, Mr Ottolenghi has not been scarred by a childhood of cauliflower cheese in this country and neither have I, so we both share a fondness for this much derided veggie. I dare you try it and serve it to the family or friends and prepare to be amazed… Not only is it easy and beautiful, it has passed again the test of my fiercest critics: My kids. Feel free to substitute with broccoli, I am sure it works just as fine. This recipe will feed 4-6.

Ingredients
1 small cauliflower, broken into 3cm florets. Ensure you remove as much of the stems as possible.
1 medium red onion
75g olive oil
1/2tsp finely chopped rosemary
7 eggs
15g basil
120g plain flour
1.5 tsp baking powder
1/2 tsp ground turmeric
150g coarsely grated Parmesan
melted butter to line the tin
1tbsp white sesame seeds
1 tsp nigella seeds
salt and black pepper

1. Line a 24cm springform cake tin with baking parchment. Coat the sides with melted butter and toss the nigella and sesame seeds onto the sides of the tin so that they stick. Boil the kettle.
2. Cut 4 round slices from the red onion (each 0.5cm thick) and set aside.
3. Cut the remaining onion in half, insert in the TM bowl and chop roughly speed 5 for about 3 seconds. Place the onion in a small pan with some olive oil and the chopped rosemary and cook on medium heat for about 10 minutes, stirring from time to time until soft. Once it is cooked, set aside to cool.
3. Whilst the onion is sautéing, pour about a litre of the boling water in your TM, place the cauliflower florets in the Varoma, and steam for 15 minutes, Varoma, speed 2 reverse blade. Ser aside when cooked.
4. Whilst the onions and cauliflower are cooling, empty the water from the TM bowl, add the chunks of Parmesan to the bowl, and chop coarsely on speed 7 about 5 seconds (depending on how large your chunks of Parmesan where). Set cheese aside.
5. Without cleaning the bowl add basil and chop a few seconds on speed 5, insert the butterfly whisk, add the eggs and the sautéed onion, mix on speed 3 for 10 seconds. Add the flour, baking powder, turmeric, salt, and plenty of back pepper, and Parmesan. Whisk on speed 4 for 10 seconds.
6. Add the cauliflower and stirring gently with the spatula, try to coat all the florets without breaking them up.
7. Pour onto your prepared tin, top with the red onion rings and insert into a 200C or fan 180C oven for 45 minutes or until a tester comes out clean.
8. Leave it to rest for 20 minutes. Best served warm or at room temperature.

Standard
Uncategorized

Cooking Class – Fresh Entertaining

I organised a cooking class for Thermomix users with chef Milli Taylor after the launch of her very successful Party Perfect Bites.  Lots of refreshing and inspiring entertaining ideas for breakfast, lunch or dinner.  We finished the class with a mezze style lunch with wine and goodie bag to take home.  Cannot wait to do it again! IMG_5810

IMG_5829

Standard
Uncategorized

Steamed Savoy Cabbage Rolls and Smokey Tomato Sauce – All In One Meal

ThermoInspire

ThermoInspire

This is one of those incredibly easy, healthy and tasty recipes that continues to surprise me because of how much even my kids like it.  It is a more grown up version of meatballs because of the wrapping using green leaves, and the tomato sauce that you make whilst the meat parcels steam away ends up thick, rich and slightly smokey.  Try it and tell me if you are not surprised yourself too!  By the way, the original recipe is with swiss chard and the result is brilliant.  I prefer to make it with swiss chard because the leaves are larger, but in this instance I only had the cabbage at hand.  Either way, a virtuous dinner with huge acceptance.  (For 4 portions)

Ingredients:


For the parcels:

6 large cabbage leaves, or 6 medium swiss chard leaves

1 medium carrot

1 slice bread

1 egg

50g milk

250 mince beef

30g rice

20g cornstarch

salt and pepper


For the sauce:

1 medium peeled onion, cut in quarters

1 clove garlic

50g olive oil

600g chopped tomatoes (fresh or tinned)

1 bay leaf

50g red wine

1 tsp sweet paprika

1tsp oregano

1tsp sugar or honey

1 tsp salt

1. If using savoy cabbage, blanche the leaves by dropping them into boiling water for 2 minutes and drain.  Remove the middle rib and set aside. If using swiss cabbage, wash leaves and cut in half lengthwise to remove the middle rib.  Set aside.

2. Put carrot in the TM bowl and grate 5 sec/speed 5.  Push down any bits on the side of the bowl or under the lid.  Add the rest of the ingredients of the meat parcels and programme 10 sec/Dough setting.

3. Place one tablespoon of the filling on each green leaf, roll it up and close with a toothpick  or simply place carefully with the seam down onto the Varoma tray and Varoma dish.

4. Do not wash the bowl and start preparing your sauce.  Place the onion and garlic in your TM bowl. 4 sec/speed 4.  Bring down any bits on the side of the bowl down with your spatula.

5 . Add oil and programme 5 min/Varoma/Sp 1.

6. Add the rest of the sauce ingredients to the bowl, place the Varoma on top, and programme 25 min/Varoma/Sp 2.

7.  When finished cooking, place the little rolls on a serving dish and pour the source over them and serve.


Standard
Uncategorized

Kitchen confusion: Thermomix tender triggers entertaining Senate scenes

http://m.canberratimes.com.au/federal-politics/political-news/kitchen-confusion-thermomix-tender-triggers-entertaining-senate-scenes-20150225-13n06o.html

Standard
Uncategorized

Quick Tips and Hints for TM5 Users

  1. The Basic Cookbook is your template to adapt your own favourite recipes


  1. Butterfly whisk: Never above speed 4


  1. Push the lid flat.   The arms will break if you consistently use them to close the lid. The arms are designed just for locking the lid.


  1. Quick Wash: 60 seconds, 60 Degrees, Speed 6


  1. To get the last bits of dough out, spin the blades. A couple of seconds on speed 9 should do the trick. Then, with a little bit of the dogh between your fingers, tap and lift the spun dough from the sides of the bowl.


  1. To power down, always press the dial on the right a few seconds, just like when you power down a computer. Do not use the wall plug or switch.


  1. Do not slide your TM. The sensitive feet are your weighing scales. Look after them.


  1. Generally speaking:


Speed 1-4 stirring and whipping

Speed 5-6 chopping

Speed 7-10 blending and grinding


  1. Some of my favourite online resources:


http://www.recipecommunity.co.uk/recindex.php,

http://www.recipecommunity.com.au,

http://www.whyisthereair.com,

http://quirkycooking.blogspot.co.uk

http://www.britishlarder.co.uk/#axzz3Q2eN0nXL


  1. Go to the following link for a list of easy recipes for Thermomix beginners assembled by bloggers ThemOMG: You click on the recipe title and it takes you straight to the recipe. .


file:///Users/isabel/Documents/Thermomix/The%20Beginners%20MUST%20Make%20List%20—%20ThermOMG.html

Standard
Uncategorized

The Financial Times reviews the TM5!

Financial Times’ How to Spend It reviews the TM5:

FEBRUARY 07 2015
JONATHAN MARGOLIS
I am highly uncomfortable with companies that only sell technology products direct, meaning you can’t get them from any store or independent website. I won’t name names, but typically you’re led to believe that buying the item – be it a vacuum cleaner or a radio – makes you part of a special circle of aficionados. And there’s often a “confusion pricing” model with an unavoidable HP payment system, which can obfuscate the fact that it is overpriced and out of date.

So when the UK agent for German company Vorwerk contacted me about the launch of a new version of a kitchen device called Thermomix – “available only from home demonstrators”, “incredibly popular in Europe” (apparently it’s owned by a bonkers proportion of Spanish households), “the first updated model in 10 years”, “secret weapon of hundreds of restaurant kitchens” – it sounded like a lot of blah.

Except that it turned out to be for real. Thermomix genuinely has a cult following in Europe, especially in Spain. (“My mum has had every model,” emails my Madrid contact. “It is fantastic, a lifesaver – everybody has one.”) And it genuinely is used by top restaurants – The Waterside Inn, for example, and The Fat Duck. Mrs Technopolis and I have tried it, and though we were not best disposed at first, I can report that it truly is astonishing.

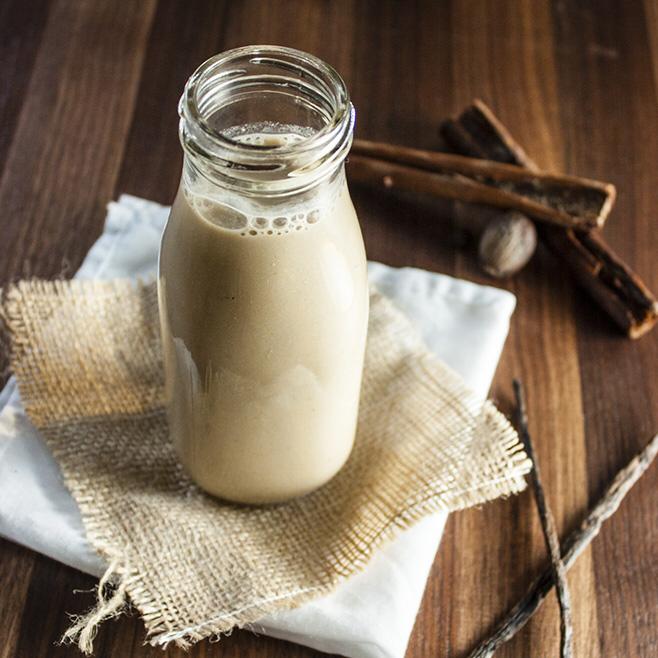
What is the Thermomix TM5? It’s a blender at heart – a very powerful one. But it’s also multifunctional: it can weigh, chop, whisk, emulsify, blend, grate, stir, knead and, after all that, cook and steam too. It does all this in one bowl with a single blade and a minimum of attachments. So the same machine can, say, grate nutmeg or Parmesan, peel garlic and chop vegetables; then it can produce from absolute scratch anything from amazing sorbet and ice cream to bread, cakes, soups, mayonnaise and casseroles. It’s a complete revelation and labour-saving in the extreme, as well as fun and satisfying. Being a new digital model, it has a touchscreen and a digital recipe book that really delivers.

OK, you have to meet the Thermomix halfway and learn how to use it. But the view from Technopolis Towers is that the only thing better than a TM5 would be two. Or even more – as many, many professional kitchens have.

£925, including demonstration

Standard
Uncategorized

American Pumpkin Pie

ThIMG_4451ere is so much comforting stuff in this super easy American Thanksgiving classic.  The aroma, the custard like filling, the spices, the rustic pie crust… Do not be afraid or intimidated by the use of what, to some of us, is not a typical baking ingredient: pumpkin. Do try it.  The pie crust is just your shortcrust pastry from the Basic Cookbook.  Do two lots of it and refrigerate for half an hour or so.  Meanwhile reach into your pantry for a few ingredients for the filling.  Mix the ingredients in your TM bowl.  Roll out the pastry, line a pie tin or dish with it, pour the pumpkin mix, stick it in the oven and relax.

When it is out and cool, whip some cream, dust a little cinnamon on top and serve.

(This recipe is from the Hummingbird Bakery Cookbook)


Ingredients

2 lots of sortcrust pastry from Thermomix’s TM5 Basic Cookbook

1 egg

425 g tin of pumpkin puree

235 g evaporated milk

220g sugar

1/4 tsp ground cloves

1 tsp salt

3/4 tsp ground cinnamon

1/4 tsp ground ginger

1 tbsp plain flour

lightly whipped cream to serve (optional)


1. Prepare your shortcrust pastry and let it rest at least 1/3 hr in the fridge.

2.When you are ready to put the pie in the oven, preheat the oven to 170C.  Roll out the pastry onto a lightly floured surface  and cover a 23cm pie dish with it.  Trim the edges (be a little generous as the dough will shrink when cooked).

3. In the TM bowl, put the sugar and grind 10 seconds speed 10.  Then add all the other ingredients except the whipped cream.  Mix 20 seconds speed 4 until all the ingredients are combined and there are no lumps.

4. Pour into the pie crust and bake in the pre heated oven for 35-40 minutes, or  until the filling does not wobble too much when shaken.  I find it sets as it cools, but if I cook it until it does not wobble at all, the crust may be too brown.

5. Leave to cool and then serve with some lightly whipped cream and a dusting of cinnamon.


Standard
Uncategorized

American Popovers – Supersized Yorkshire Puds

IMG_4419

As our friends across the pond prepare to celebrate Thanksgiving I think it very timely to share with you a recipe for popovers.  That is what the Americans call their version of our beloved Yorkshire puddings.  In good old American tradition, they go large.  Starting with the tins, which are deeper than ours in the UK (my husband brought me some from NY and later I found out that  Williams Sonoma delivers in the UK…)

For me, popovers  are like a meal onto themselves, however, I have noticed that back in the USA it has become de rigeur in many a steak place to put a basket of these in front of you to snack on whilst you wait for the brontosaurus steak… Dangerous.   Personally I cannot eat these and then a steak.   Still, back to the popovers.

There are many creative variations of popovers, the ones in this picture have cheddar cheese, that is why they have a dimply texture.  If you do not add cheese you get a more traditional, smooth top.  Go wild and try combinations with herbs, cheese, paprika, chilli, even bits of crispy bacon on top.  I must experiment with gluten free flour too, because I have a feeling that it could work.  If any of you do try it, please let me know your results.

Happy Thanksgiving to all.


For 8 popovers (you can easily double this recipe)

8 tbs flavourless oil such as grapeseed

2 large eggs

250 g milk

160 plain flour

1/2tsp salt

1 pinch cayenne

30 g cheddar cheese (optional)


1. Grease the tins, leave about 1 tbs oil at the bottom of each cup.

2. If you are using cheese start by grating it Sp 5/ 7 seconds. Reserve.

3.  Whisk eggs, milk, flour, salt and cayenne pepper Sp 3/20 secs.  Pour batter into each popover tin, filling about 3/4 oIMG_4414f the way up the sides.  Sprinkle about 1 tsp of grated cheese atop each popover.

4. Place the tins in a cold oven and heat to 230C and bake until puffed and well browned, about 25 min.

Standard
Uncategorized

Millet Cake with Steamed Vegetables, Chorizo, and Light Cheese Sauce

I had posted a photograph of this millet cake a few days ago with the promise of a forthcoming recipe… Finally I get to it. I did  not mean to be a tease.  It makes for a very nutritious meal that gets made in about 30 minutes.

If you have never used millet before you are in for a treat.  If you do not eat gluten, then you most probably already consume millet as it is a grain (actually it is really a seed) with none of the gluten protein.  It has a nutty flavour and a host of health properties ranging from probiotic properties, mood regulation through the provision of serotonin, it is alkaline so it helps to regulate our body’s pH, …

IMG_4366

Make this millet cake like a corn cake, as a side with all types of stews.  You can substitute millet for rice, or quinoa in a lot of recipes too.

I am giving you here the recipe according to Jean Georges Vongerichten, but I like to often change the ingredients to make it dairy free, substituting butter with coconut oil.  The “cheese” sauce I make with almond milk, no cheese, and a pinch of paprika, and oil instead of butter too.

This cake serves 4, but it can be doubled easily.


Ingredients

210 g millet

salt

40 grams butter soft or melted

2 eggs

2 yolks

60g milk

ground black pepper

grapes or neutrally flavoured oil


300g vegetables for steaming, washed

100g chorizo sliced

Cheese sauce (Thermomix The Basic Cookbook)


  1. In a medium saucepan combine your millet, 420g water, pinch of salt and cover.  Cook for about 20 minutes on medium heat until the water is absorbed.  Turn off the heat with the lid still on and let it rest for 10 minutes.
  2. Meanwhile turn the oven on at 260C and make your cheese sauce following the recipe in the Basic Cookbook.  This will take about 7 minutes.  I first grate a bit of cheddar, then add all the sauce ingredients and cook following instructions.  When finished decant to a little jug.
  3. Now steam your vegetables.  No need to wash the bowl.  Place your vegetables in the Varoma tray, place 1 litre of water in the Thermomix bowl and stream for 15 minutes, Varoma, Speed 2. This not only steams your veggies but it will help clean your TM bowl!
  4. When the vegetables are ready set them aside and check your millet.
  5.  Add your butter, whole eggs, yoke, milk and salt and pepper to taste to the millet.
  6. Place a 20-25 cm ovenproof skillet, preferably non stick, over high heat, add the oil, and when it smokes, pour in the batter and cook for about 3 minutes, or until the edges firm up a bit and some bubbles appear in the middle.  Transfer the skillet to the oven and bake until firm on top about 10 minutes.
  7. To serve, invert onto a plate so the crisp and prettier side is up.  On the same skillet, quickly fry (no need to add oil) the slices of chorizo, place the veggies on top of the millet cake, drizzle with some cheese sauce, and when they are a little crispy, put the chorizo on top.


Standard
Uncategorized

BBQ Sweet Potato Chips

To make this recipe you do not need a Thermomix, however, I had promised my marathoner friend Meredith ages ago that I would give her the recipe for these chips (fries for you Meredith).  Believe it or not, these are actually good for you.  Sweet potatoes are considered a healthier tuber, so if you must get your potato fix, this may just be the ticket.  Leave the skin on as that is where most nutrients are.  The potatoes are baked and not fried, and whilst you do not get a crunchy finish, they are utterly moreish.  And do not be discouraged by the list of ingredients.  They are all good stuff super foods and once you have them in your pantry  you can add to savoury foods (not the coconut sugar!) very liberally.  Read up on them if you like, if you do not, just try this recipeIMG_4389 and lick your fingers afterwards.  Greedily and guiltlessly.


Ingredients

1 Kg sweet potatoes washed

2 tbs coconut oil, melted

1.25 tsp paprika

1/2 tsp chilli powder

1/4 tsp garlic powder

3/4 tsp onion powder

1 tsp mesquite powder

1/2 tsp maca powder

1/8 tsp cayenne pepper

3/4 tsp sea salt

1 tsp coconut sugar

  1. Heat up oven to 230C
  2. Cut the sweet potatoes into long chips, about 1cm thick.  Toss with the melted coconut oil, spread out onto 2 baking trays, and roast in the oven for 15-25 minutes until they begin to brown.  Give it 5-10 extra minutes for a little crispier chips.
  3. Whilst the chips are in the oven, prepare your spice mix by puting all your other ingredients into a small bowl and mix.
  4. When you take the chips out of the oven, sprinkle liberally with your spice mix and toss gently to coat evenly.  Serve hot.
Standard
Uncategorized

Feta and Pistachio Dip

This lovely dip is from Persiana by Sabrina Ghayour, the cookbook that is my current favourite. I have to yet find a recipe I do not fancy trying… This is a simple, original, and delicious dip. You must try it. It serves 8.

IMG_4374

100 g shelled pistachio nuts
75ml olive oil
300g feta cheese
handful of dill, leaves picked (I use dry dill too)
2 handfuls of coriander leaves picked
1 garlic clove peeled and crushed
1 long red chilli of medium heat
3 large tbsp Greek yogurt
rind of 1 lemon and juice of 1 lemon
salt to taste

  1. Put all the ingredients in the TM bowl except the pistachios and feta. Blitz for 20 seconds, speed 9. Scrape down with your spatula the sides of the bowl. Blitz for another 20 seconds speed 9.
  2. Add the pistachios and chop 20 seconds, speed 5. I like a chunky consistency.
  3. Add the feta and blend it all for another 20 seconds speed 5. It looks best, and for me it tastes best too, with a rustic texture.
  4. Taste and add salt if desired. Remember feta is very salty.
Standard
Uncategorized

Empanadillas Dough

I have been asked for the recipe for Spanish empanadillas and I know that when you want to make something you just want to make it NOW.  So even though I have not time at the moment to make some empanadillas to photograph, I am going to post the recipe for the dough at least.  At some not too distant future I hope to make some, photograph them, and add them to this post…

People in the UK call these empanadas, but in Spain, an empanada is a large pie, not single small pies/pasties. No matter what you call it, you will need to make your dough… Traditionally you fry these beauties but for those cutting back of frying, they are also delicious cooked in the oven. In another post I will add filling ideas, but this can get you started for sure. The dough does not keep well, it cannot be frozen, but fortunately, it only takes 5 minutes in your Thermomix!

I will include two recipes. First the more traditional, but in my opinion much greasier, recipe, and a second recipe which is actually my favourite, and the one we use at home. The second recipe is only suitable for the oven and it is more like a bread recipe as it contains yeast.

First Recipe:

350 all purpose flour
150g extra virgin olive oil
150g water
1 tsp salt

  1. Place a bowl on top of the TM lid, weigh your flour into that bowl and reserve.
  2. In your TM bowl, place the water and olive oil. Programme 3 min, Varoma, sp 2.
  3. Take the lid off the TM and dump the flour in one go together with the salt. Programme 20 seconds, sp 4. Let it rest a few minutes.
  4. Roll out thinly and cut it in circles to the desired size. (about 10-15cm in diameter)
  5. Place a tablespoon of filling in the centre. Dab water onto the edge of the circle, fold the circle onto itself to create a semi circle, and press the edges with a fork.
  6. You can cook these in the oven at 180C-200C or you can deep fry them in plenty of oil…

Second Recipe:

50g water
50g EVOO
100g white wine
40g butter
1 egg
30g fresh bakers yeast or 1 sachet active dry yeast

450g strong bread flour

1tsp salt
1 beaten egg to glaze

  1. In the TM bowl put the water, oil, wine and butter. Programme 1 min, 37C, sp 2.
  2. Add the egg and yeast. Mix 5 seconds, sp 4.
  3. Add the flour and salt. Mix 15 seconds, sp. 6, then knead 2 min, closed lid, dough button. Let it rest in the bowl with the measuring cup on for about 30 minutes until it doubles in volume.
  4. Using a bit of extra flour, roll thinly and proceed as in step 4 above.
  5. These empanadillas need to be glazed with some beaten egg before going into the oven to improve their appearance.
Standard
Uncategorized

Spiced Pumpkin Creamer

Pumpkin creamerNobody does pumpkin like the Americans. I am right now in NY and even though the weather is unseasonably warm you see spiced pumpkin coffees and teas everywhere. I would like to share this recipe with you, because I particularly like that it is a “healthier” version. It will keep for about one week in the fridge and you just add it to your tea or coffee, or even your porridge… This recipe is from triedandtrueblog.com

Ingredients

290 g nut milk (I like almond or cashew. Pick your favourite)
2 tbsp pumpkin purée. You can find tins in the UK. If not, roast some butternut squash, purée it, use 2tbs or around 25g
4 Medjool dates, pitted
1 tbsp maple syrup
1 tsp cinnamon
1/4 tsp each of cloves, nutmeg, ground ginger
1/2 tsp vanilla extract
Pinch of salt
2 tbsp coconut oil

Directions

1. Put all ingredients in the TM bowl. Blend 1.5 minute, speed 10.
2. Store in airtight container and keep refrigerated for up to a week.
3. Use liberally.


Standard
Uncategorized

Linguine with Trompette Mushrooms and Garlic Crumble

I found this recipe in Sal y Pimienta magazine, Autumn Special Issue whilst hunting for ideas for what to cook with my favourite mushrooms: trompette.  I love their colour, their name, and their autumn flavour.  This recipe is so easy and so chic.  Serves 4.

Ingredients:

4 slices of loaf breadrosemary
3 garlic cloves
50g butter
250g linguine
400g trompette mushrooms, brushed clean
1 onion
400g single cream
olive oil
salt

Method:

  1. To make the garlic crumble, put the bread slices slightly torn in pieces, the garlic cloves, rosemary to taste (I think it is very strong, so I only use 2 sprigs of about 20cm each) into the TM bowl. Turbo for 1 second. Repeat twice. You want fairly chunky bread crumbs that will sautee well and give a crunchy texture. Pour the bread crumbs into a bowl and reserve.
  2. Put the butter in the TM bowl, heat for 2 minutes, Varoma, speed 1. Add the bread crumbs, and toast with the butter for 2 minutes, Varoma, speed spoon until golden and crunchy. Reserve into a separate bowl.
  3. To cook the linguine put 1 litre of boiling water in the TM bowl, insert the linguine through the lid opening for the MC, and program for the required time, Varoma, reverse blade, speed spoon. When finished, drain and reserve, keep warm.
  4. Put about 20g of oil in the TM bowl and the onion in quarters, chop 6 seconds, speed 5. Brush down the contents on the inside of the bowl and chop another 3 seconds on speed 5. Add the mushrooms and program the TM 5 minutes, Varoma, reverse blade, speed spoon. Then the cream and heat at 5 minutes, 70C, reverse blade, speed spoon.
  5. Pour the sauce onto your reserved linguine and sprinkle with a good helping of your garlic crumble.


Standard
Uncategorized

Pumpkin Stuffed with Prawns and Cheese

This recipe is from Thermomix Spain, from their November 2014 magazine.  I love the seasonal character of it, and the fact that you use the pumpkin as your bowl.  This recipe serves 6.  A nice accompaniment would be some simple boiled or steamed white rice.


FullSizeRenderIngredients

1000g medium uncooked prawns

1 medium pumpkin (around 3kg)

100g parmesan cheese in chunks

250g mascarpone cheese

250g fromage frais

3 garlic cloves

100g EVOO

150g onion in quarts

150g bell peppers (red and green)  in large pieces

2 tbs tomato concentrate

1tbs cornstarch

200g coconut milk

10g minced parsley or minced coriander

1.5tsp salt

2 pinches ground white pepper


Method

  1. Preheat oven to 180C
  2. Peel prawns, reserve 6 without peeling, and reserve the heads and shells.  Slice off the top of the pumpkin, and with the help of a spoon remove the seed and the interior threads.  With your hands, grease the outside of the pumpkin with some oil, and cover the pumpkin with aluminium foil and leave it to rest upside down on the oven tray.
  3. Put in the oven for 40 minutes or until the flesh is cooked.
  4. Put the parmesan cheese in the bowl and grate 2s, speed 10.
  5. Add the mascarpone and the fromage frais and mix 15 s, speed 5.  Put this cream of cheeses into a bowl.  Wash and dry the TM bowl.
  6. Put 1 garlic clove in the TM bowl with the EVOO. Chp 3 s, speed 7 and fry  it 5 min, Varoma, speed 1.
  7. Add the 6 unpeeled prawns and sautee 3min, Varoma, reverse speed, speed spoon.  Remove the prawns, leaving the oil in the TM bowl.
  8. To the TM bowl add the heads and shells of the prawns and sautee 4 min, Varoma, speed 2.  Strain by inserting the steaming basket into the bowl and collect the prawn oil.  Wash the TM thoroughly.
  9. In the TM put the prawn oil, 2 garlic cloves, onion, peppers and tomato concentrate.  Chop 5s, speed 5 and sautee 5 min, Varoma, speed 1.
  10. Dissolve the cornstarch in the coconut milk and add it to the TM bowl.  Add 150g of your cream of cheeses, 5g parsley, salt and pepper.  Programme 3min, 100C, speed 2.
  11. Add the peeled prawns and heat up 5 min, Varoma, reverse blade, speed spoon.
  12. Spread the inside of the pumpkin with 300g of your cream of cheeses.  Pour the contents of the TM bowl into the pumpkin and add the remaining cream of cheeses.
  13. Put it in the oven 20 minutes at 180C.  When it is ready , remove from the oven and sprinkle with parsley and decorate with the reserved whole prawns.  Serve immediately.
Standard
Recipes

Thermomix Playdough

Ingredients

Playdoh1_Fotor

  • 320g water (boiling hot from jug)
  • 100g cooking salt
  • 1 tablespoon cream of tartar
  • 280g plain flour
  • 15g coconut oil
  • Food colouring to suit
  • (Depending on the brands of ingredients used you may need to add more flour)

Method

  1. Put Salt in TM bowl and mill Speed 9, 3 seconds. Depending on the brand of salt you use you may need a little longer – you want it to look like a fine powder.
  2. Put cream of tartar in and then add water. Heat for 3 minutes at 60 degrees on Speed 3.
  3. Once finished, look to make sure that all your salt has been dissolved, give a little stir with the spatula and heat for a further 2 minutes at 60 degrees on Speed 3.
  4. Add flour and mix for 20 – 40 seconds or until well combined on Speed 3.
  5. Add coconut oil, set dial to closed lid. Interval Speed 1 – 2 minutes – you are looking for small pebble like consistency.
  6. I then like to add food colouring in a separate bowl and knead together as I find if I knead in the Thermomix it dries out too quickly – that being said wear some disposable gloves if you don’t want rainbow hands!

Suggestion: Once kneaded to the colour consistency you want, you can wrap the dough in baking paper and then pop it in a zip lock bag until you find some suitable pots to put them in.

Standard
Recipes

Whole Orange Cake with Orange Curd

Ingredients

OrangeCake1

  • 250g sugar
  • 1 juicing orange, unpeeled, cut in quarters
  • 3 eggs
  • 100g room temperature butter or 100ml unflavoured oil (e.g. sunflower, grape seed)
  • 130g cream or 1 natural yogurt pot (around 120g)
  • 250g self raising flour
  • 1 pinch salt

Method

  1. Preheat oven to 180
  2. Grease your mould and flour lightly. Reserve (I use paper liner so can skip this step)
  3. In the TM bowl put sugar, orange and eggs. 3 min, 37degrees, speed 5
  4. Add the butter and cream. Mix 5 seconds speed 4
  5. Add the flour, and salt. Programme 15sec speed 3.
  6. Finish by folding it with the spatula.
  7. Pour it onto prepared mould, gently tap onto counter to get rid of bubbles. Make sure surface is even. The mould should not be more than half full. In the oven for 30 min approx.

Suggestion: Before putting in the oven, you can sprinkle with sugar to create a little crust, or after cooked, dust with icing sugar.

Standard